Welcome and thank you for choosing Logistia Route Planner!
This quick guide will introduce you to Logistia. We’ll walk you through the simple process of adding your first stops and optimizing your very first route. If you have already started and need assistance in specific areas, you can consult our other sections.
Add your stops
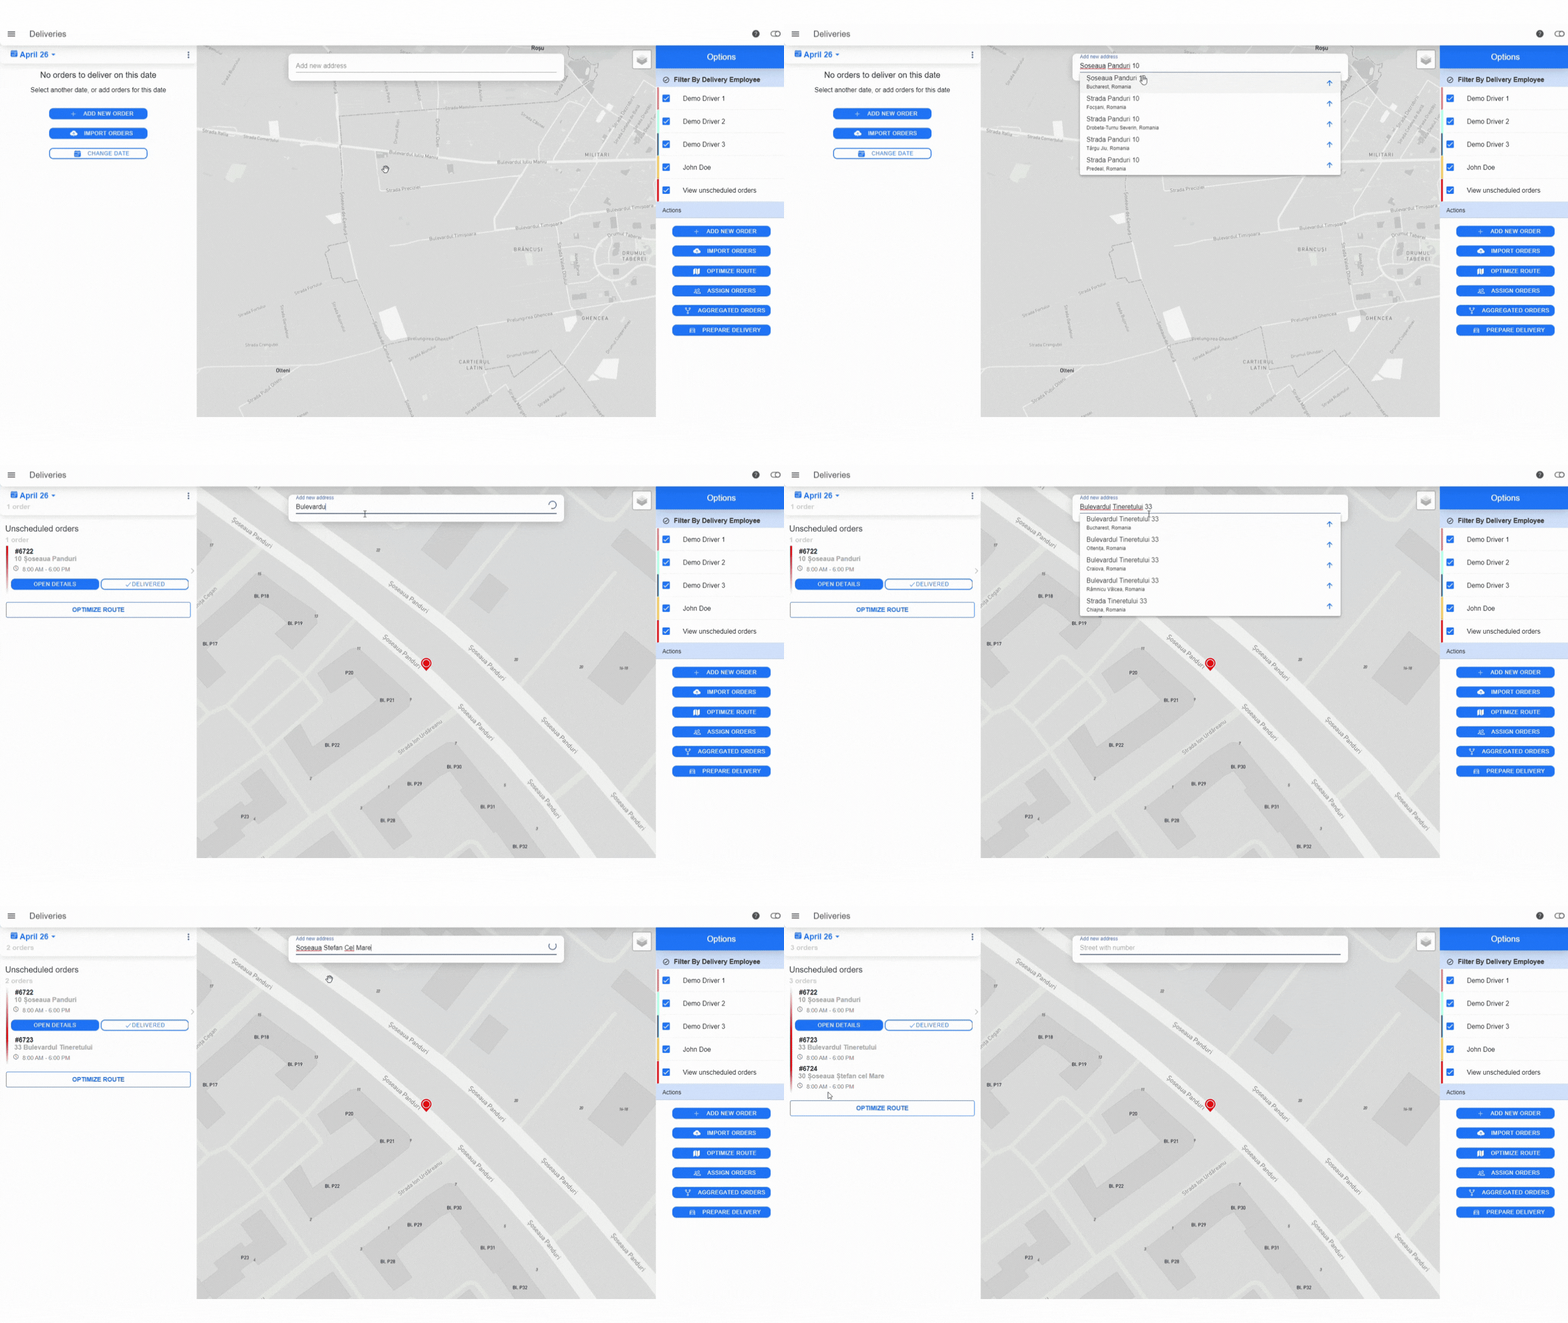
Getting started with Logistia starts with adding your stops. So first, let’s add some stops for optimization. Logistia Route Planner allows you to add your stops in multiple ways, but for a quick start, you can add only the addresses.
Click on the field over the map and start typing your street name, number, and city for the best precision. The autocomplete function will help you select the best address. Once you have selected it, the pin will appear on the map and the address will be displayed in the left-side list.
After you finish adding all the stops for the selected delivery date, it’s time to optimize the route.

Optimize the route
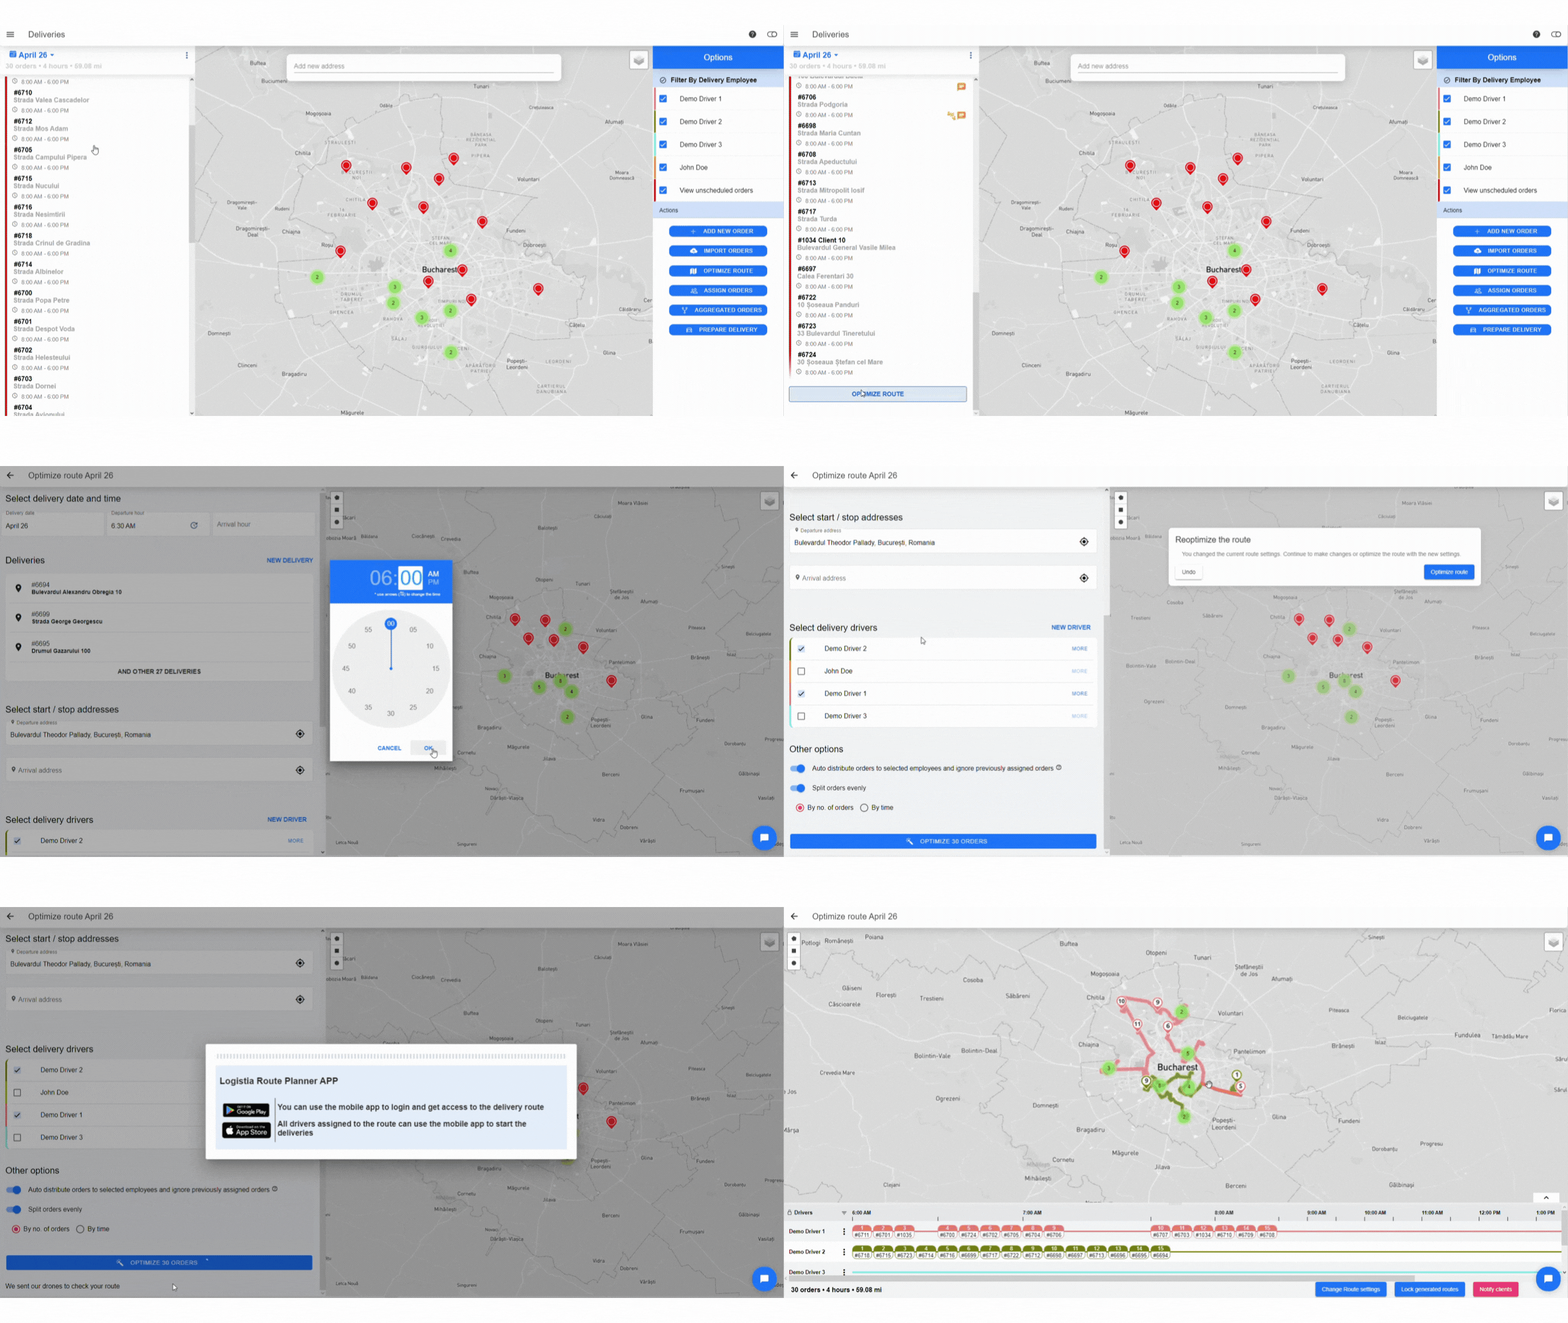
To optimize the stops you added, click on Optimize Route button.
Before getting started with the optimization in Logistia, there are a few fields you should set:
- Route delivery date
- Departure hour of the route
- Arrival hour of the route (optional)
- Departure address
- Arrival address (optional, can be same as departure address)
If you are the sole owner of the account, you will see only yourself in the section to choose the delivery drivers. When you’re ready, click on Optimize Route button and your route will be ready in no time.

Start driving
After optimizing the route, all there’s left to do is start driving.
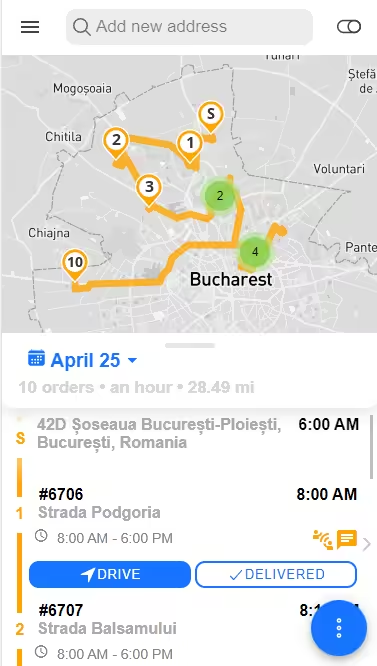
Install Logistia Route Planner from Google Play or App Store to have it handy all the time. Just click on the Drive button to go to your first stop. When you have finished, click on Delivered and the list will be focused on the second stop.

Finish the day
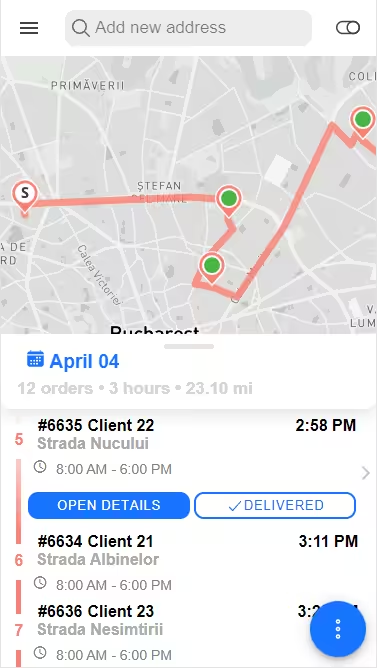
Progressing through the list, the stops become green on the map and in the list. At the end of the day, all stops should be done.
